Installing an over-the-range (OTR) microwave typically takes 2-4 hours for two people and requires tools like a power drill, stud finder, and level. Most OTR microwaves are 30 inches wide and need at least 18 inches of clearance above the cooktop, with secure mounting to both wall studs and an upper cabinet. This guide provides a step-by-step process to ensure a safe and secure installation.
Before You Begin: The Essential Prep Work
Jumping straight into the installation without proper preparation is a recipe for a headache. A little planning goes a long way. For shop curated microwave ovens on this site.
Are You Sure You Can DIY This?
Let’s have a frank chat. Installing an over-the-range (OTR) microwave involves lifting a heavy appliance, drilling into walls and cabinetry, and some basic electrical awareness. If you’re comfortable using a power drill, finding wall studs, and can safely lift around 50-70 pounds with a partner, you’ve got this. If not, there is absolutely no shame in calling a professional. A botched installation can damage your cabinets, your new microwave, or worse.
Tools and Materials Checklist
Gathering your tools beforehand is a non-negotiable step. There’s nothing worse than being halfway through, holding up a microwave, and realizing your drill bit is the wrong size.
- Tape measure
- Stud finder
- Level
- Power drill with various bits (including a larger one for the power cord)
- Phillips and flat-head screwdrivers
- Socket wrench set
- Pencil or marker
- Safety goggles
- Work gloves
- A reliable helper (this is a two-person job!)
- The microwave’s included mounting bracket and templates
Sizing and Clearance: The Golden Rules
Your new microwave needs room to breathe and operate safely. Before you drill a single hole, verify these measurements:
- Width: Most OTR microwaves are designed to fit in a 30-inch wide opening, which is standard for most kitchen ranges. Always measure your specific space.
- Height: Ensure there’s enough clearance between the bottom of the microwave and your cooktop. The National Kitchen & Bath Association (NKBA) recommends at least 18 inches, but check your local building codes and the microwave manufacturer’s specs. For gas ranges, you may need more.
- Depth: Check the depth of your upper cabinets. They are typically 12-13 inches deep. Your microwave will stick out past this, which is normal.
Crucial Safety Note: Ensure there is an electrical outlet inside the upper cabinet where the microwave will be installed. This outlet should be on a dedicated circuit to handle the power demands of a modern kitchen appliance. If there isn’t one, you’ll need to hire an electrician.
The Step-by-Step Over The Range Microwave Installation Guide
|
Our Picks for the Best Microwave Oven in 2026
As an Amazon Associate, we earn from qualifying purchases.
|
||
| Num | Product | Action |
|---|---|---|
| 1 | BLACK+DECKER Digital Microwave Oven with Turntable Push-Button Door, Child Safety Lock, Stainless Steel, 0.9 Cu Ft |

|
| 2 | TOSHIBA ML-EM09PA(BS) Small Microwave Oven with 6 Auto Menus, Mute Function & Child Lock, LED Lighting, Perfect for Apartment, 0.9 Cu Ft, 10.6 Inch Removable Turntable, 900W, Black Stainless Steel |
|
| 3 | COMFEE\' EM720CPL-PMB Countertop Microwave Oven with Sound On/Off, ECO Mode and Easy One-Touch Buttons, 0.7cu.ft, 700W, Black |
|
| 4 | Breville BOV450XL Mini Smart Countertop Oven and Toaster Oven, Small, Brushed Stainless Steel |
|
| 5 | Chefman Countertop Microwave Oven 1.1 Cu. Ft. Digital Stainless Steel Microwave 1000 Watts with 6 Auto Menus, 10 Power Levels, Eco Mode, Memory, Mute Function, Child Safety Lock, Easy Clean |
|
| 6 | Farberware 0.7 Cu. Ft. Countertop Microwave Oven – 700 Watts Power, Auto Cook Settings, Defrost, Easy Clean and Child Safety Lock - Stainless |
|
| 7 | BLACK+DECKER EM720CB7 Digital Microwave Oven with Turntable Push-Button Door, Child Safety Lock, 700W, Stainless Steel, 0.7 Cu.ft |
|
| 8 | Chefman Countertop Microwave Oven 0.7 Cu. Ft., 700 Watts with 10 Power Levels, 6 Cooking Presets with One-Touch Express Cook, Eco Mode, Child Safety Lock, & Mute Button - Black |
|
| 9 | TOSHIBA EM131A5C-BS Countertop Microwave Ovens 1.2 Cu Ft, 12.4\" Removable Turntable Smart Humidity Sensor 12 Auto Menus Mute Function ECO Mode Easy Clean Interior Black Color 1000W |
|
| 10 | Cooks Innovations Non-Stick Oven Protector Mat - Heavy Duty Nonstick Oven Rack Liners to Protect Convection, Electric, Gas, & Microwave Ovens - BPA & PFOA Free Heat Resistant Baking Mat |
|
Alright, tools are ready, measurements are confirmed, and your helper has arrived. Let’s get to the main event.
- Unbox and Inspect Everything: Carefully open the box. Remove the microwave and all its parts. Check for any shipping damage. Locate the instruction manual, the mounting bracket, and the paper templates (usually attached to the box or manual). Don’t throw the box away just yet! It can make a handy platform to rest the microwave on during the process.
- Remove the Old Unit (If Applicable): If you’re replacing an old OTR microwave or range hood, turn off the power at the circuit breaker first. Unplug the unit. Have your helper support the old microwave while you unscrew the mounting bolts from inside the upper cabinet. Carefully lower it and set it aside.
- Prepare the Cabinet and Wall: Use the included templates to mark your drilling locations. There will be one for the upper cabinet (for the support bolts and power cord) and one for the wall (for the mounting bracket). Tape them securely in place and use your level to ensure they are perfectly straight.
- Mark Your Drill Holes: Using a pencil or an awl, press firmly through the marked spots on the templates to make an indentation in the wood and drywall. This is where you’ll drill. Use your stud finder to locate the wall studs behind the template. Ideally, at least one of the mounting bracket’s screw holes will align with a stud. Mark the stud locations.
- Prepare the Microwave’s Venting: Your microwave is likely set up for recirculating ventilation from the factory. If you’re venting it outside (either through the roof or the rear wall), you’ll need to rotate the blower motor now. This process is specific to each model, so consult your user manual for this step. It usually involves removing a few screws, turning the blower unit, and re-securing it.
- Drill the Holes: Put on your safety goggles. Drill the pilot holes in the upper cabinet and the wall where you made your marks. For the power cord hole in the cabinet, you’ll need a larger spade bit or hole saw. For the wall bracket, use a smaller bit for pilot holes.
- Mount the Support Bracket: This is the most critical part of the over the range microwave installation guide. This bracket holds most of the weight.
- If your pilot holes hit a wood stud, use the provided lag screws to secure the bracket tightly to the wall.
- If you’re drilling into drywall without a stud, you must use toggle bolts. Drill a hole large enough for the toggle to pass through, then feed the bolt through the bracket, thread on the spring-loaded toggle, and push it through the wall. It will spring open behind the drywall. Tighten it securely.
“John Miller, an appliance technician with over 15 years in the field, always says, ‘The mounting bracket is the unsung hero. If that’s not level and anchored securely into a stud, you’re just asking for trouble down the line.'”
- Hoist and Secure the Microwave: This is where your helper is essential.
- Thread the power cord up through the hole you drilled in the cabinet.
- Together, carefully lift the microwave.
- Hook the slots on the bottom-back edge of the microwave onto the tabs of the wall mounting bracket.
- While your helper supports the unit, get the mounting bolts and feed them through the holes in the upper cabinet down into the top of the microwave.
- Hand-tighten them first, then use your socket wrench to tighten them securely. Do not over-tighten.
- Final Connections and Testing: Plug the microwave into the outlet in the cabinet. Restore power at the circuit breaker. Place a cup of water inside and test a 1-minute heating cycle. Check that the turntable spins, the light works, and the exhaust fan operates. Congratulations, you did it!
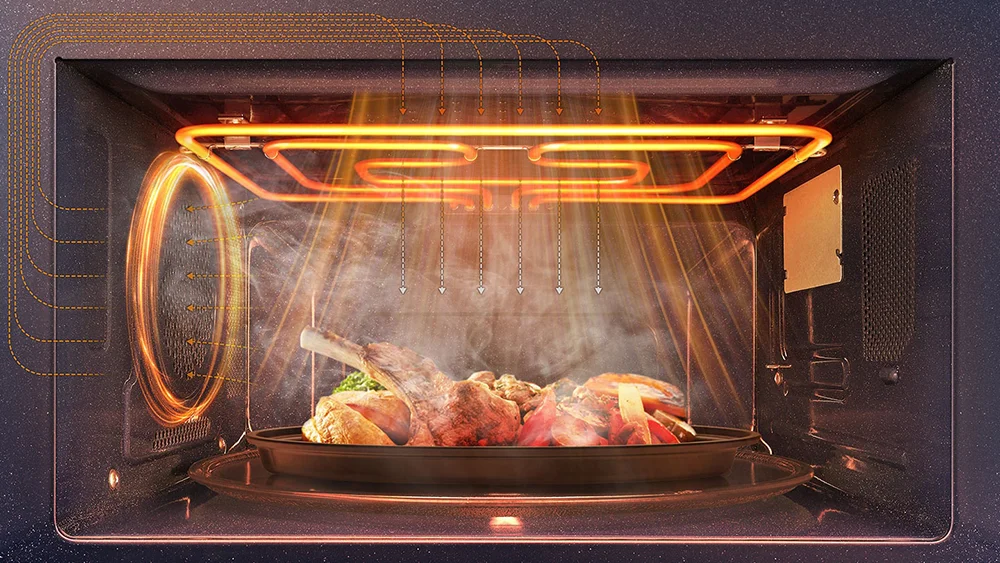
What Makes Over-the-Range Microwaves So Special?
Now that it’s installed, let’s appreciate what makes this type of kitchen appliance so popular. Unlike countertop models that just reheat food, an OTR microwave is a dual-function powerhouse, combining cooking with ventilation. Modern units offer incredible features that go far beyond popcorn. Look for things like inverter technology, which provides a constant stream of power for more even cooking, instead of just cycling on and off.
Here’s a quick comparison:
| Feature | Countertop Microwave | Over-the-Range (OTR) Microwave |
|---|---|---|
| Placement | Sits on counter, takes up space | Mounted above the range, saves space |
| Ventilation | None | Built-in 2-speed or 4-speed fan |
| Lighting | Interior light only | Interior light + cooktop lighting |
| Installation | Plug and play | Requires mounting, drilling, and lifting |
| Price | Generally less expensive | Generally more expensive |
| Wattage | Varies widely (700-1200W) | Typically higher (1000-1200W+) |
Safety First: Using Your New Appliance
A microwave is incredibly safe when used correctly, but a few rules are absolute. Never, ever put these items inside:
- Metal: This includes aluminum foil, metal-trimmed plates, and silverware. It can cause sparks (arcing) and damage the microwave’s internal components.
- Sealed Containers: Pressure builds up and can cause an explosion. Always vent containers or poke holes in foods like potatoes.
- Travel Mugs: Many stainless steel travel mugs are not microwave-safe.
- Nothing at All: Running a microwave empty can seriously damage the magnetron, the part that generates the microwaves.
Frequently Asked Questions (FAQ)
Q: Do all over-the-range microwaves have to vent outside?
A: No. All OTR models can be set up for recirculating ventilation. They pull air through a charcoal filter to remove odors and then vent it back into the kitchen. Venting outside is more effective at removing steam and smoke but isn’t always possible.
Q: Can I install an OTR microwave without a cabinet above it?
A: It’s not recommended. OTR microwaves are designed to be secured by bolts running through the bottom of an upper cabinet. Without this top support, the wall bracket alone is not sufficient to hold the unit safely.
Q: How much clearance is needed for an over-the-range microwave?
A: A minimum of 18 inches from the cooktop to the bottom of the microwave is standard, but you must check your appliance’s manual and local building codes for the exact requirements, especially for high-output gas ranges.
Q: What’s the average cost for professional installation?
A: Professional installation costs typically range from $100 to $300, depending on your location and the complexity of the job (e.g., if new electrical work or ductwork is needed).
Q: Do I need a dedicated electrical circuit for my microwave?
A: Yes, it is highly recommended and often required by electrical codes. Microwaves draw a significant amount of power (high wattage), and sharing a circuit with other appliances can lead to frequently tripped breakers.
Wrapping It Up
Installing a new appliance can feel daunting, but by taking it one step at a time, you can absolutely achieve a professional-quality result. From preparation and measuring to hoisting and tightening that final bolt, you’ve replaced a simple task with a rewarding home improvement project. We hope this over the range microwave installation guide has given you the confidence and know-how to tackle the job.
Now, go enjoy that extra counter space and your fantastic new microwave! Have any installation stories or tips of your own? Drop a comment below—we’d love to hear them.
Frequently Asked Questions
Do all over-the-range microwaves have to vent outside?
No, not all over-the-range (OTR) microwaves must vent outside. All OTR models can be configured for recirculating ventilation, which uses a charcoal filter to remove odors before returning air to the kitchen. External venting is generally more effective for steam and smoke removal but is not always feasible.
Can an OTR microwave be installed without a cabinet above it?
It is not recommended to install an over-the-range (OTR) microwave without an upper cabinet. OTR microwaves are designed to be secured by bolts passing through the bottom of an upper cabinet, and the wall bracket alone is insufficient to safely support the unit's weight.
How much clearance is needed for an over-the-range microwave?
A minimum of 18 inches of clearance is typically required from the cooktop to the bottom of the microwave. However, always consult your specific appliance's manual and local building codes for exact requirements, especially when installing above high-output gas ranges.
What is the average cost for professional OTR microwave installation?
Professional over-the-range microwave installation typically costs between $100 and $300. This price can vary based on your location and the complexity of the job, such as whether new electrical work or ductwork is required.
Is a dedicated electrical circuit necessary for a microwave?
Yes, a dedicated electrical circuit is highly recommended and often mandated by electrical codes for microwaves. Microwaves draw significant power, and sharing a circuit with other appliances can frequently lead to tripped circuit breakers.
Install an Over-the-Range Microwave
Follow these steps to safely and securely install your new over-the-range microwave, ensuring proper clearance and electrical connections.
Before starting, gather all necessary tools, including a tape measure, stud finder, level, power drill, screwdrivers, and safety goggles. Ensure you have a reliable helper, as this is a two-person job. Unbox the microwave and inspect it for any damage, locating the mounting bracket and templates.
Use the provided templates to accurately mark drilling locations on both the upper cabinet and the wall. Use a stud finder to locate wall studs for secure bracket mounting. If your microwave requires external venting, consult the user manual to rotate the blower motor accordingly before installation.
Wearing safety goggles, drill pilot holes in the marked locations on the cabinet and wall. Use a larger bit for the power cord hole in the cabinet. Securely mount the support bracket to the wall, using lag screws if hitting a stud or toggle bolts for drywall without a stud. Ensure the bracket is level and firmly anchored.
With your helper, carefully lift the microwave and thread the power cord through the cabinet hole. Hook the microwave's bottom-back edge onto the wall mounting bracket tabs. While your helper supports the unit, insert and hand-tighten the mounting bolts from inside the upper cabinet, then securely tighten them with a socket wrench without over-tightening.
Plug the microwave into the dedicated outlet in the cabinet and restore power at the circuit breaker. Perform a test by heating a cup of water for one minute. Verify that the turntable rotates, the interior light functions, and the exhaust fan operates correctly to confirm a successful installation.
Cooking gear we tested in our own kitchens
Practical specs, not advice. Unsubscribe anytime.
The advice about needing at least 18 inches of clearance above the cooktop was really important, and something I hadn’t considered. We had to adjust our cabinet slightly to make it work. The guide was good, but I found some of the tool recommendations a bit basic; I already knew I needed a drill. Still, it got the job done.
I appreciated the emphasis on using a stud finder and making sure the mounting was secure. I’ve seen too many wobbly microwaves! My only minor complaint is that I wish there was a bit more detail on the electrical hookup, but overall, it was super helpful for getting our new unit up safely.
Fantastic guide! I’m pretty comfortable with DIY projects, but installing an OTR microwave always felt a bit daunting. The clear instructions on securing it to both wall studs and the upper cabinet gave me the confidence to tackle it. No more ugly countertop microwave for us!
This guide was a lifesaver! My husband and I were dreading installing our new 30-inch wide microwave, but the step-by-step instructions made it so much clearer. We definitely needed two people for the lifting part, just like it mentioned. It took us about 3 hours total, which was right in line with the estimate.