A cracked microwave door is a serious safety hazard that requires immediate attention. You should never operate a microwave with a damaged door because it can lead to microwave radiation leakage, which poses significant health risks. The door’s integrity is crucial for containing the microwaves generated by the magnetron, acting as a Faraday cage to prevent radiation escape. If your microwave door is cracked, unplug the unit immediately and do not use it until it has been properly repaired or replaced.
First Things First: Why a Cracked Microwave Door is a Big Deal
Before we even talk about repairs, we need to address the elephant in the room. Is it safe to use a microwave with a cracked door? For see our microwave ovens recommendations on this site.
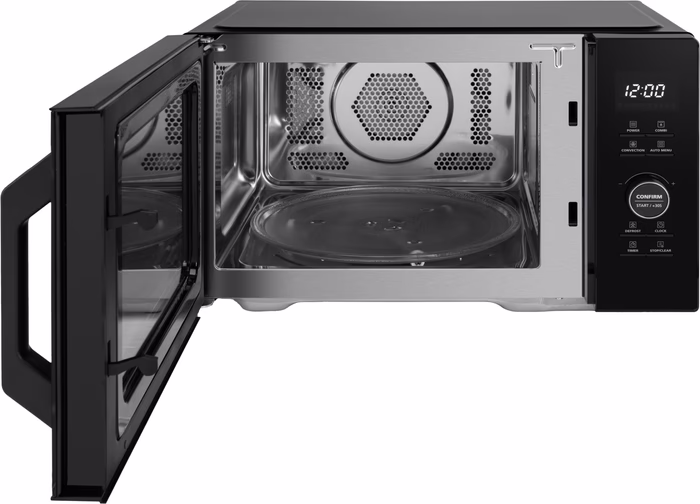
The short and non-negotiable answer is NO. A microwave oven isn’t just a simple box that heats food; it’s a precisely engineered device. The door is one of its most critical safety components. It acts as a Faraday cage, containing the microwaves generated by the magnetron. The door typically has multiple layers, including a perforated metal screen that blocks the microwaves from escaping while still letting you see your food.
A crack, especially on the inner panel, can compromise this shield. This could lead to microwave radiation leakage, which is a serious health hazard. Furthermore, a crack compromises the door’s structural integrity and the seal, which is designed to keep the energy contained.
Safety Alert: Never operate a microwave oven with a damaged or cracked door. Unplug the unit immediately and do not use it until it has been properly repaired or replaced. Your safety is always more important than a quick meal.
Assessing the Damage: Inner vs. Outer Glass
Take a closer look at the crack. Microwave doors usually have at least two layers of glass or plastic: an outer decorative panel and an inner panel that is part of the choke seal assembly.
- Crack on the Outer Glass: If only the outermost cosmetic panel is cracked, the microwave’s shielding might still be intact. However, it’s a risky assumption. The crack can spread to the inner layer over time due to heat and vibrations. It’s still not recommended to use it.
- Crack on the Inner Glass: This is the most dangerous scenario. A crack on the inner panel means the primary radiation shield is breached. This is a non-negotiable, “do-not-use” situation.
Your Three Main Options: Repair, Replace, or Call a Pro
So, you’ve unplugged the appliance. What’s next? You’re standing at a crossroads, and your decision depends on your budget, your DIY skills, and the age of your microwave.
1. The DIY Repair Route
|
Our Picks for the Best Microwave Oven in 2026
As an Amazon Associate, we earn from qualifying purchases.
|
||
| Num | Product | Action |
|---|---|---|
| 1 | Chefman Countertop Microwave Oven 1.1 Cu. Ft. Digital Stainless Steel Microwave 1000 Watts with 6 Auto Menus, 10 Power Levels, Eco Mode, Memory, Mute Function, Child Safety Lock, Easy Clean |

|
| 2 | Farberware 0.7 Cu. Ft. Countertop Microwave Oven – 700 Watts Power, Auto Cook Settings, Defrost, Easy Clean and Child Safety Lock - Stainless |
|
| 3 | COMFEE\' EM720CPL-PMB Countertop Microwave Oven with Sound On/Off, ECO Mode and Easy One-Touch Buttons, 0.7cu.ft, 700W, Black |
|
| 4 | Breville BOV450XL Mini Smart Countertop Oven and Toaster Oven, Small, Brushed Stainless Steel |
|
| 5 | Cooks Innovations Non-Stick Oven Protector Mat - Heavy Duty Nonstick Oven Rack Liners to Protect Convection, Electric, Gas, & Microwave Ovens - BPA & PFOA Free Heat Resistant Baking Mat |
|
| 6 | BLACK+DECKER EM720CB7 Digital Microwave Oven with Turntable Push-Button Door, Child Safety Lock, 700W, Stainless Steel, 0.7 Cu.ft |
|
| 7 | BLACK+DECKER Digital Microwave Oven with Turntable Push-Button Door, Child Safety Lock, Stainless Steel, 0.9 Cu Ft |
|
| 8 | TOSHIBA EM131A5C-BS Countertop Microwave Ovens 1.2 Cu Ft, 12.4\" Removable Turntable Smart Humidity Sensor 12 Auto Menus Mute Function ECO Mode Easy Clean Interior Black Color 1000W |
|
| 9 | Chefman Countertop Microwave Oven 0.7 Cu. Ft., 700 Watts with 10 Power Levels, 6 Cooking Presets with One-Touch Express Cook, Eco Mode, Child Safety Lock, & Mute Button - Black |
|
| 10 | TOSHIBA ML-EM09PA(BS) Small Microwave Oven with 6 Auto Menus, Mute Function & Child Lock, LED Lighting, Perfect for Apartment, 0.9 Cu Ft, 10.6 Inch Removable Turntable, 900W, Black Stainless Steel |
|
For the handy folks out there, replacing the entire door assembly is often a manageable task. This is usually more cost-effective than calling a technician, but it comes with its own set of challenges.
- Pros: Most affordable option; a great sense of accomplishment.
- Cons: Requires ordering the correct part, having the right tools, and carries a risk of improper installation, which could be a safety hazard. You could also void any remaining warranty.
2. Calling a Professional Technician
If you’re not comfortable dealing with appliance internals (and there’s no shame in that!), a professional is your safest bet.
- Pros: Guarantees a safe and correct repair; saves you time and stress.
- Cons: This is often the most expensive option. The cost of the part plus labor can sometimes approach the price of a new microwave.
3. Replacing the Entire Microwave
Sometimes, you have to know when to cut your losses. Repairing an old or inexpensive microwave might not be the most sensible financial decision.
- Pros: You get a brand-new appliance with a full warranty, modern features like inverter technology for more even cooking, and better energy efficiency.
- Cons: Higher upfront cost than a simple repair.
A good rule of thumb: If the repair cost (parts + professional labor) is more than 50-60% of the price of a comparable new microwave, it’s probably time to go shopping.
A Step-by-Step Guide on How to Fix a Cracked Microwave Door
If you’ve decided to tackle this yourself, congratulations! Let’s get it done right. This guide involves replacing the entire door assembly, as replacing just the glass is often more complex and not recommended.
Disclaimer: This is a potentially dangerous repair. Microwaves contain a high-voltage capacitor that can hold a lethal electrical charge even when unplugged. Proceed with extreme caution and at your own risk.
What You’ll Need:
- A replacement microwave door (specific to your model number)
- A Phillips head screwdriver
- A flathead screwdriver or plastic pry tool
- A pair of insulated gloves
The Process:
- Safety First: UNPLUG THE MICROWAVE! This is the most crucial step. Do not just turn it off; physically remove the plug from the wall outlet.
- Find Your Model Number: You need the exact model number to order the correct replacement door. Look for a sticker on the inside frame of the microwave (visible when you open the door), on the back, or on the side of the unit.
- Order the Replacement Part: Once you have the model number, you can search for the replacement door assembly online from appliance part suppliers or directly from the manufacturer.
- Discharge the Capacitor (Advanced Safety Step): This is a step many guides skip, but it is vital for safety. As John Miller, a certified appliance technician with 15 years of experience, always stresses, “The capacitor is the most dangerous part of a microwave. Always assume it’s charged. Taking 30 seconds to safely discharge it can prevent a serious injury.” To do this, you’ll need to remove the outer casing of the microwave. Use a screwdriver with a well-insulated handle to carefully touch both terminals of the capacitor simultaneously with the metal shaft. You may see a spark and hear a pop—this is normal.
- Remove the Old Door:
- For most countertop microwaves, the door lifts off its hinges. Open the door fully.
- Look at the point where the door meets the microwave body. You’ll see two hinges, typically at the top and bottom.
- Use your plastic pry tool or flathead screwdriver to gently pry upwards on the door from the bottom hinge. It should pop out.
- Then, carefully pull the door down and away from the top hinge. The entire assembly should come free. Over-the-range microwave doors may have a different mechanism involving screws, so consult your user manual if possible.
- Install the New Door:
- This is essentially the reverse of removal.
- Align the new door’s top hinge pin with the hinge hole on the microwave chassis. Slide it in.
- Swing the door down and align the bottom hinge pin, pushing it firmly into place until it clicks or seats securely.
- Test the Door and Safety Interlocks:
- Gently open and close the new door several times. It should move smoothly and latch securely without any wobble.
- Check the safety interlock switches (the small plastic prongs that stick out from the door). Ensure they correctly engage with the slots in the microwave frame. These switches are what tell the microwave it’s safe to turn on.
- Final Check: Once you’re confident the door is installed correctly, you can replace the outer casing (if you removed it) and plug the microwave back in. Place a cup of water inside and run it for 30 seconds to ensure everything is working as it should.
When is it Time to Just Buy a New Microwave?
Deciding whether to fix a cracked microwave door often comes down to simple math. Consider buying a new one if:
- The microwave is old: If your unit is over 7-8 years old, its other components, like the magnetron, might be nearing the end of their life anyway.
- The repair cost is high: Get a quote for a professional repair and the price of a replacement door. If that total is over half the cost of a new, comparable model, upgrading is the smarter choice.
- You want new features: Technology has come a long way. Newer models boast features like inverter technology for precise power control, sensor cooking that automatically adjusts time, and air fryer or convection capabilities. An unfortunate crack could be a great excuse for an upgrade.
Frequently Asked Questions (FAQ)
Q: Can I just use superglue or epoxy to fix the crack in my microwave door?
A: Absolutely not. Adhesives are not designed to withstand the heat and microwave energy inside the oven. They will likely fail, and they do nothing to restore the radiation shielding, making it extremely unsafe.
Q: Why did my microwave door crack in the first place?
A: The most common causes are impact (banging something against it) or thermal shock (a sudden, extreme temperature change, though this is less common). Sometimes, a manufacturing defect can be the culprit.
Q: How much does a replacement microwave door cost?
A: The price varies widely depending on the brand and model. It can range from as little as $50 for a basic model to over $200 for a high-end, built-in, or over-the-range unit.
Q: Will my home warranty or manufacturer’s warranty cover a cracked door?
A: Typically, no. Warranties usually cover manufacturing defects and internal component failure. Accidental damage, like a crack from an impact, is almost always excluded. It’s always worth checking your policy, but don’t be surprised if it’s not covered.
Q: What’s the difference between a countertop, over-the-range, and built-in microwave?
A: Countertop microwaves are the most common; they are standalone units you can place anywhere. Over-the-range (OTR) models are installed above your stove and include a ventilation fan. Built-in microwaves are designed to be installed flush within your cabinetry for a seamless look. The door replacement process can be more complex for OTR and built-in models.
The Final Word on Fixing a Cracked Microwave Door
Discovering a cracked microwave door can be a real headache, but it’s a problem with clear solutions. Your top priority must always be safety. Never, ever use a damaged microwave. From there, weigh your options honestly: a DIY repair if you’re skilled and cautious, a professional call for peace of mind, or a full replacement if it makes financial sense. Learning how to fix a cracked microwave door is empowering, but knowing when to call in an expert or upgrade your kitchen appliance is just as important.
Have you ever faced this problem? Share your experience or ask any questions in the comments below! We’re here to help you make the smartest choice for your kitchen.
Frequently Asked Questions
Can I use superglue or epoxy to repair a cracked microwave door?
No, you absolutely cannot use superglue or epoxy to fix a cracked microwave door. These adhesives are not designed to withstand the heat and microwave energy inside the oven, will likely fail, and do not restore the crucial radiation shielding, making the appliance extremely unsafe.
What typically causes a microwave door to crack?
Microwave doors most commonly crack due to impact, such as banging an object against it, or sometimes from thermal shock caused by sudden, extreme temperature changes. In rare cases, a manufacturing defect can also be the underlying cause of the crack.
How much should I expect to pay for a replacement microwave door?
The cost of a replacement microwave door varies significantly by brand and model, typically ranging from $50 for a basic countertop unit to over $200 for high-end, built-in, or over-the-range models. Always check your specific model number for an accurate price.
Does a home or manufacturer's warranty cover a cracked microwave door?
Generally, home and manufacturer's warranties do not cover accidental damage like a cracked door caused by impact. They typically cover manufacturing defects or internal component failures. It is advisable to review your specific policy, but coverage for such damage is uncommon.
What are the key differences between microwave types for door replacement?
Countertop microwaves are standalone units with doors that often lift off hinges. Over-the-range (OTR) models are installed above stoves and include ventilation, while built-in microwaves are integrated into cabinetry; both OTR and built-in models can have more complex door removal and replacement mechanisms, sometimes involving screws.
How to Replace a Cracked Microwave Door Assembly
This guide outlines the steps to safely replace a cracked microwave door assembly, a DIY task that can be more cost-effective than professional repair or full replacement.
Prioritize safety by physically unplugging the microwave from the wall outlet. Locate your microwave's exact model number, usually found on a sticker inside the door frame, on the back, or on the side of the unit, to ensure you order the correct replacement door.
Purchase the specific replacement door assembly online using your model number. For safety, discharge the high-voltage capacitor by removing the outer casing and carefully touching both capacitor terminals simultaneously with an insulated screwdriver. This prevents lethal electrical shock.
Open the microwave door fully. For most countertop models, use a flathead screwdriver or pry tool to gently lift the door from the bottom hinge, then pull it down and away from the top hinge. Over-the-range models may require consulting your user manual for screw-based removal.
Reverse the removal process: align the new door's top hinge pin with the corresponding hole on the microwave chassis and slide it in. Swing the door down, align the bottom hinge pin, and firmly push it into place until it clicks or seats securely.
Gently open and close the new door several times to ensure smooth movement and secure latching. Verify that the safety interlock switches on the door correctly engage with the slots in the microwave frame. Finally, replace the outer casing, plug in the microwave, and run a cup of water for 30 seconds to confirm proper function.
Cooking gear we tested in our own kitchens
Practical specs, not advice. Unsubscribe anytime.
I was so worried when I saw the crack in my microwave door. This guide was a lifesaver! I followed the steps for replacing the door panel and it worked perfectly. It’s such a relief knowing my family isn’t exposed to any radiation leakage now. Definitely recommend this for anyone facing the same issue.
The advice about unplugging the unit immediately was spot on, I hadn’t even thought of that. My complaint is that finding the exact replacement part for my older model Samsung was a real pain. The guide was helpful for the actual repair process, but sourcing the part took forever. Still, better than risking radiation.
Seriously, thank you for this! I had no idea a cracked door was such a big deal regarding radiation. I thought it was just cosmetic. The detailed instructions on how to assess the damage and whether to repair or replace were super clear. My microwave is back in action and I feel much safer using it.
Great info here. My old GE microwave had a small crack near the hinge and I was about to just toss it. The explanation about the Faraday cage really made me understand why it’s so important to fix. I ended up ordering a new door assembly online and the repair wasn’t as hard as I thought it would be. Saved me from buying a whole new unit.