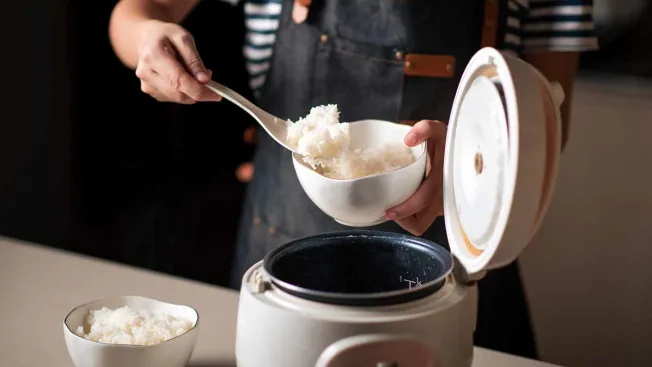
Ever found yourself in a pinch? Maybe the rice cooker gave up the ghost right before dinner, or you’re in a dorm room with limited kitchen appliances. Whatever the reason, learning How To Cook Rice In The Microwave is a kitchen skill that’s an absolute game-changer. I remember the first time I tried it, skeptical that a microwave could produce anything other than rubbery, uneven grains. But with the right technique, you can get perfectly fluffy, delicious rice every single time. Let’s dive in.
Why Bother Cooking Rice in a Microwave?
You might be wondering, “Why not just use the stove?” It’s a fair question. While stovetop cooking is classic, the microwave offers a few distinct advantages, especially for modern, busy lifestyles.
This method is incredibly convenient for small portions. If you’re cooking for one or two, firing up a big pot on the stove can feel like overkill. A microwave lets you make the exact amount you need with minimal fuss and cleanup. It’s also generally faster, as you don’t have to wait for a large volume of water to boil. For anyone short on space or equipment, it’s the perfect solution.
The Essentials: What You’ll Need
Before we get to the magic, let’s gather our tools. The beauty of this method is its simplicity. You don’t need any fancy gadgets.
- Long-grain white rice: (e.g., Jasmine or Basmati) – this method is optimized for it.
- Water: Simple tap water is perfectly fine.
- A large, microwave-safe bowl or dish: This is non-negotiable. It needs to be at least three times the volume of the rice and water to prevent messy boil-overs. Glass or ceramic is ideal.
- A microwave-safe lid or plate: To cover the bowl. A lid with a steam vent is perfect. If not, you can rest a plate on top, leaving a small gap for steam to escape.
- A fork: For fluffing the rice at the end.
The Ultimate Guide: How to Cook Rice in the Microwave Step-by-Step
Ready to become a microwave rice master? Follow these steps precisely, and you can’t go wrong. This guide is based on a standard 1000-watt microwave oven. We’ll talk about adjusting for different wattages later.
- Measure and Rinse: For a single serving, start with 1/2 cup of rice. For two servings, use 1 cup. The most crucial first step that many people skip is rinsing the rice. Place your rice in a fine-mesh sieve and rinse it under cold running water for about 30 seconds, or until the water runs clear. This removes excess surface starch, which is the secret to preventing gummy, sticky rice.
- Get the Ratio Right: Transfer the rinsed rice to your microwave-safe bowl. Now for the water. The golden ratio for white rice is typically 1 part rice to 2 parts water. So, for 1 cup of rice, you’ll add 2 cups of water. You can also add a pinch of salt here for flavor if you like.
- First Cook: High Power: Place the uncovered bowl in your microwave. Cook on HIGH power (100%) for 10 minutes. You’ll see the water come to a vigorous boil and the rice will start to absorb it.
- Second Cook: Medium Power: Carefully remove the bowl from the microwave—it will be extremely hot. Give it a quick stir. Now, cover the bowl with its lid or a plate, leaving a small opening for steam to vent. Return it to the microwave and cook on MEDIUM power (50%) for another 5 minutes. This lower-power phase allows the rice to gently steam and absorb the remaining water without scorching.
- The All-Important Rest: Once the 5 minutes are up, do not open the microwave door. Let the rice sit and steam in the residual heat for at least 5-10 minutes. This step is vital. It allows the moisture to redistribute evenly throughout the grains, ensuring a perfectly cooked, fluffy texture from top to bottom.
- Fluff and Serve: Finally, remove the bowl from the microwave. Be careful of the hot steam when you lift the lid. Take a fork and gently fluff the rice, separating the grains. And there you have it—perfectly cooked rice, ready to serve.
A Quick Safety Warning: Always use a bowl that is significantly larger than your ingredients. As the water boils, it can easily foam up and spill over, creating a starchy, hard-to-clean mess inside your microwave. Give it plenty of room to breathe!
Fine-Tuning Your Microwave Rice: Pro Tips from the King
Knowing the basic steps is one thing, but understanding the why is what separates a beginner from an expert. Let’s refine your technique.
Understanding Your Microwave’s Wattage
Not all microwave ovens are created equal. The cooking times I’ve provided are based on a 1000-watt model, which is a common standard. If your microwave’s wattage is different, you’ll need to adjust.
- Higher Wattage (e.g., 1200W): Your microwave is more powerful. You may need to reduce the initial high-power cooking time to 8-9 minutes.
- Lower Wattage (e.g., 700W): Your microwave is less powerful. You may need to increase the initial high-power cooking time to 12-14 minutes.
The best way to know for sure is to check your rice after the first high-power stage. Most of the water should be absorbed, and you should see little “craters” on the surface of the rice.
The Magic of Inverter Technology
If you have a modern microwave with Inverter technology, you’re in for a treat. Traditional microwaves simulate lower power levels by cycling the magnetron (the part that creates microwaves) on and off. An inverter microwave, however, delivers a true, consistent stream of lower power. This is ideal for delicate tasks like cooking rice, as it provides a gentle, even heat that prevents the edges from overcooking while the center remains hard. It’s a feature I always recommend for those who use their microwave for more than just reheating food.
|
Our Picks for the Best Microwave Oven in 2026
As an Amazon Associate, we earn from qualifying purchases.
|
||
| Num | Product | Action |
|---|---|---|
| 1 | COMFEE\' EM720CPL-PMB Countertop Microwave Oven with Sound On/Off, ECO Mode and Easy One-Touch Buttons, 0.7cu.ft, 700W, Black |

|
| 2 | Chefman Countertop Microwave Oven 0.7 Cu. Ft., 700 Watts with 10 Power Levels, 6 Cooking Presets with One-Touch Express Cook, Eco Mode, Child Safety Lock, & Mute Button - Black |
|
| 3 | Chefman Countertop Microwave Oven 1.1 Cu. Ft. Digital Stainless Steel Microwave 1000 Watts with 6 Auto Menus, 10 Power Levels, Eco Mode, Memory, Mute Function, Child Safety Lock, Easy Clean |
|
| 4 | BLACK+DECKER Digital Microwave Oven with Turntable Push-Button Door, Child Safety Lock, Stainless Steel, 0.9 Cu Ft |
|
| 5 | BLACK+DECKER EM720CB7 Digital Microwave Oven with Turntable Push-Button Door, Child Safety Lock, 700W, Stainless Steel, 0.7 Cu.ft |
|
| 6 | TOSHIBA EM131A5C-BS Countertop Microwave Ovens 1.2 Cu Ft, 12.4\" Removable Turntable Smart Humidity Sensor 12 Auto Menus Mute Function ECO Mode Easy Clean Interior Black Color 1000W |
|
| 7 | Cooks Innovations Non-Stick Oven Protector Mat - Heavy Duty Nonstick Oven Rack Liners to Protect Convection, Electric, Gas, & Microwave Ovens - BPA & PFOA Free Heat Resistant Baking Mat |
|
| 8 | Farberware 0.7 Cu. Ft. Countertop Microwave Oven – 700 Watts Power, Auto Cook Settings, Defrost, Easy Clean and Child Safety Lock - Stainless |
|
| 9 | TOSHIBA ML-EM09PA(BS) Small Microwave Oven with 6 Auto Menus, Mute Function & Child Lock, LED Lighting, Perfect for Apartment, 0.9 Cu Ft, 10.6 Inch Removable Turntable, 900W, Black Stainless Steel |
|
| 10 | Breville BOV450XL Mini Smart Countertop Oven and Toaster Oven, Small, Brushed Stainless Steel |
|
Adjusting for Different Types of Rice
While this guide is perfect for long-grain white rice, what about other varieties?
- Brown Rice: Brown rice has a tough outer bran layer and requires more water and a longer cooking time. Use a ratio of 1 part rice to 3 parts water. Microwave on high for 10 minutes, then on medium for 20-25 minutes. The resting time is even more important here—give it a full 10 minutes.
- Basmati/Jasmine Rice: These aromatic rices work perfectly with the standard recipe. Rinsing is especially important to bring out their fluffy texture.
- Short-grain/Sushi Rice: This rice is naturally stickier. Use a ratio of 1 part rice to 1.25 parts water. The cooking times should be similar, but expect a stickier, more cohesive result, which is what you want for this type of rice.
Common Pitfalls and How to Avoid Them
Learning how to cook rice in the microwave can involve a little trial and error. Here are some common problems and their solutions.
- My rice is too hard or crunchy. This usually means one of two things: not enough water or not enough cooking time. Double-check your ratio and consider adding an extra minute or two to the medium-power cooking phase next time.
- My rice is mushy and waterlogged. This is the opposite problem: too much water or too much time. Be precise with your measurements. Also, make sure you aren’t skipping the resting step, as it helps dry out any excess moisture.
- The water boiled over and made a mess. Your bowl was too small! Always choose a dish that is at least 3 times the volume of your rice and water combined. A 2-quart bowl is a good size for 1 cup of rice.
Keeping Your Appliance in Top Shape
A clean microwave is an efficient microwave. Food splatters can absorb energy, leading to uneven cooking. Here’s a simple way to clean it:
- Fill a microwave-safe bowl with 1 cup of water and a few tablespoons of white vinegar (or sliced lemon).
- Microwave on high for 3-5 minutes, or until the water is boiling and the interior is steamy.
- Let the bowl sit in the closed microwave for another 5 minutes. The steam will loosen any caked-on grime.
- Carefully remove the bowl and the turntable. Wipe the interior clean with a sponge or paper towel. Everything should come off with ease.
Frequently Asked Questions
Here are some of the questions I get asked most often about this topic.
Q: Can I use any plastic container to cook rice?
A: Absolutely not. You must use a container that is explicitly labeled “microwave-safe.” Some plastics can warp, melt, or leach chemicals into your food when heated. When in doubt, stick to glass or ceramic.
Q: Can I cook more than 1 cup of rice at a time?
A: You can, but it becomes less efficient. For larger quantities (more than 1.5 cups of dry rice), a dedicated rice cooker or the stovetop method is generally more reliable and provides more consistent results.
Q: Do I really need to let the rice rest?
A: Yes, 100%. This step, called carryover cooking, is where the magic happens. The residual steam finishes the cooking process and allows the grains to firm up. Skipping it often results in rice that is wet on the outside and hard on the inside.
Q: Can I add butter, oil, or other seasonings?
A: Of course! You can add a pat of butter or a drizzle of olive oil along with the salt at the beginning for richer flavor. You can also use broth instead of water for an instant flavor boost.
Q: Why is my rice cooking unevenly in the microwave?
A: This can be due to a “hot spot” in your microwave oven. Most modern units have a rotating turntable to combat this. If yours doesn’t, or if you still have issues, try stopping the microwave halfway through the first cook, giving the rice a quick stir, and then resuming.
Conclusion
Mastering how to cook rice in the microwave is more than just a party trick; it’s a practical skill that can save you time, effort, and cleanup. It proves that this ubiquitous kitchen appliance is far more versatile than many people believe. By understanding the simple principles of ratios, timing, and the power of your specific machine, you can ditch the fear of subpar results and embrace the convenience. So next time you’re in a bind, remember this guide and cook up a bowl of perfectly fluffy rice with confidence.